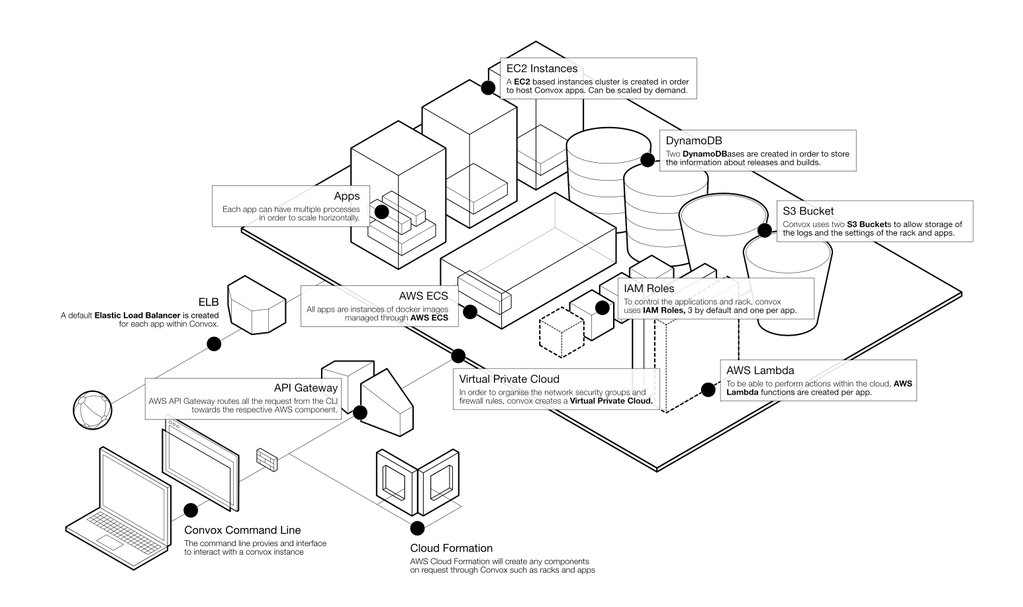
Convox Rack is an open source deployment platform that is installed into your AWS account. A Rack creates and manages all of the underlying infrastructure needed to run and monitor your applications. A Rack is the unit of network isolation -- applications and services on a Rack can only communicate with other applications and services on the same Rack.
 (Rack architecture when running on AWS)
Dynamic Runtime
A Rack will start multiple identical servers on which it will containerize and run your applications. By using a homogenous runtime we can treat each individual server as disposable and recover easily from common failure scenarios.
Private Network
Each Rack creates a private network inside which it runs its servers and services. All access from the internet comes through load balancers which are specifically configured to route traffic to your containers.
S3 Buckets
The Rack will create one S3 bucket to hold logs and rack settings information as well and one bucket for each new Application - used to store Release artifacts, CF Templates, etc.
Rack Installation
Deploy to AWS
Connect an AWS Account
Click on the integrations link in the main navigation button then click the plus sign on the runtime integration section.

This grants Convox access and permission to help manage resources in your AWS account.
See AWS Integration for more details.
Install an AWS Rack
Next, click on Racks in the main navigation and click the button and select your AWS account. Choose an ECS-based rack from the drop-down. Enter a descriptive Rack name such as production if you plan to deploy production services, or staging if this is for testing.
Alternatively, you can use the CLI to install a Rack: convox rack install aws -n {RACK_NAME}.
Local CLI control
Wait for the Rack to finish installing.
You can now switch your CLI to point at your new Rack.
$ convox racks
NAME             STATUS
local/convox     running
acme/production  running

$ convox switch acme/production
Switched to acme/production

